I missed yesterday's FTTT, but had planned to post this. (I am just a little under-the -weather and not working at my normal pace.)
I found this pkg of three frames in Target's Dollar Spot (but it was $2.50...they suck you in there! and then put things in there at a higher price! Darn Dollar Spot!) LOL It was still a good deal. (Even cheaper than the $1 store I figured...) They came in white, black or a natural wood color. (And honestly, I got some of all three colors for different places in my house.) One thing I was unsure of was if they came with a hook in the back to hang them up on...it is always such a pain to have to add those...BUT! They did! In fact, they all came with black ribbon attached to a clippy thing on each side of the frame, so Yeah! :) I recently took a bunch of pics of my daughter (collage of them above) and had so many I liked, I thought this was a perfect and inexpensive way to display them...so I printed them as 4x6's (so cheap!) and got three pkgs of these frames and for under $10 for everthing...wala!
From this: To that:
 Questions for any of you reading this-what do you think about adding some of the rub-ons to the frames? I'm kinda unsure here... 1) of how well it will work-they aren't a flat frame, 2) Do I like it better this way and then if I get them on and don't....?? 3) Color of rub-ons? Black would look sharp, but there really isn't anything else black in her room...I am planning on painting her room soon and decorating it all. I was going to make her a lavender and green bedspread (I bought the fabric 2? years ago) but she is sooo infatuated with pink, I am rethinking that...then I thought pink and green...but now I am thinking pink, yellow and brown? I think I like that last one best, but don't know that she will...
I'm also thinking of blowing one pic up to put a larger one in the center...of course I would have to add a couple more around the outside to make them all go around the larger one...but I think I could find some more poses I liked. ;)
Suggestions/Comments/Ideas on all of the above?
(The pic is them laying on my l.r. floor...I haven't put them up yet-waiting to paint first.)
Saturday, January 24, 2009
FTTT Sat!!!
Wednesday, January 21, 2009
Dorothy's shoes
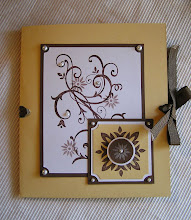
 I had the idea of this card before Christmas, but just recently found the time (or TOOK the time) to try and all of my ideas together. It honestly is not "good enough" for me still-not what I envisioned still, think I can get better still...but here it is for now...apparently a work-in-progress. (It's taking me awhile to get back into a groove with stamping. The more often I stamp, the faster and better the cards seem to come, and I haven't stamped in forever!)
I used the pine needles from the Fantastic Foliage set to make the Christmas tree and added some rhinestones for some sparkling Christmas lights. Then I used the shoes from Humor in High Heels for the shoes and some red glitter embossing powder to make them Dorothy's shoes. Originally, I only embossed them (the outside of them). Later I decided to add some glue and more glitter to cover them all.
The sentiment I printed on my computer and kinda did a play on words between the show "Wizard of Oz" and the Christmas song. Get it? ;) I wish they had included a stamp with this set that said "There's no place like home". You could use it as a miss you card that way, also as card to let people know you moved, or as a housewarming card, all kinds of things...
Anyway-it's a work-in-progress like I said...maybe I will have it perfected for next Christmas! Haha!
(Sorry the pic is not that great too-took it at night, when I had to use the flash...it is an olive type freen, real red, and so saffron in color.)
Monday, January 19, 2009
Club night-Perpetual Bday calendar


 For our stamp club night this past week, we made a perpetual Birthday Calendar (a calendar where you list people's bdays that you can hang and use every year).
I actually started one of these several months ago and actually included a corner of it in a pic of sneak peaks to come, but never finished it....so Yeah! I finally did now!
I like some months better than others. The cover is really simply embossed, but honestly it will never even show. It was a great project for the beginning of the year and we used all kinds of products, from embossing, to water colors, to markers, to ink, to all kinds of stamp sets, and on and on!
The pages were just made on the computer (I have them in Word if anyone wants me to send them the attachment, just let me know.) I have a binding machine as well, that we used to bind them all together.
I think I like April, July, and November the best. Originally I thought I would stamp more in the middle and all over, but after doing a few, I decided that I liked it better at the top and bottom alone. I needed to stamp off more on a few though, b/c when I went to write in bday names, the ink was too dark and made it hard to see the names on some. (Ex: Jan)
After the pics were taken, I also used my crop-a-dile to punch a hole in it to hang on a nail as well.
Thanks S!
Thursday, January 15, 2009
Tuesday, January 13, 2009
Yummies!
 This post is just for fun...thought someone might benefit from it. (I'm also postin
 g it on my family's blog, so sorry if I am doubling up posts for some of you...)
Made these yesterday and they are just soooo easy and yummy...I thought I would share. (My variation of the PB Kiss cookies)
Take one box  of chocolate cake mix. Add two eggs and 1/3 cup cooking oil and mix. Drop spoonfuls onto cookie sheet and cook at 365. It's hard to tell when they are done, since they are brown anyway. Cook until they begin to crack all over the top and take out. Put Mint Hershey's kisses on top and let cool.
Wala!
(These cookies are also good made without the kisses and adding chocolate chips, white choc chips, PB chips or Andes mints ships to the batter instead.)
Monday, January 12, 2009
Target's $1 spot
Here are a couple more finds I got last week at the Dollar Spot. I'm excited to do some fun things with them soon. A box of notepaper to alter (above) (Funny sidenote too: On Splitcoast under the Technique challenge for today, they are making origami boxes which resemble this too. They look so cute and easy to boot! I might try one later today if I can find the time. Here are the directions from splitcoast if you want to look it up.)
 Keychains where you can insert whatever you want (above)
 Here are a few examples where I just printed from my computer to give them away to children at church this year for birthdays. The pics are all related to the theme for the year. They can put them on the zipper of their scripture bags.
I also want to stamp some. They would also be great for ID's for backpacks.
More posts later this week!
Friday, January 9, 2009
FTTT FRIDAY!!!!!!!!
Well, I have several things in the making for FTTT, but here's a blast from the past for this week...
MAILBOXES are back at TARGET's dollar spot!
Here are a few that I did last year...
From this: To that:

 They are so easy and fun to dress up and fill with whatever you like. I have given baby gifts away in them, teacher gifts (filled with post-its, decorated paper clips and pends, notepades, stamped magnets on tile, etc.) and even given some away empty as a thank you for babysitters!
 They usually go fast! Go get 'em now!
Monday, January 5, 2009
Promises! Promises!
It feels like it has been forever since I have posted or had to time to "create" something...and I actually do have so much I want to share-just have not had the time to finish and post. Later this week though-I promise! :)
Hope that everyone had a great holiday season!


Welcome!

Hi! I'm Robyn from Create it. Go! and I love to create! Whether its a wood craft, painting, papercrafting, simple sewing, vinyl, new recipes, photography adventures, or fun with my Silhouette, join me for tutorials and loads of fun!


Follow me on Instagram!

Member of the Glue Dots Design Team

Find me here!


POPULAR POSTS
-
 Two of my nieces are graduation from high school this year...the oldest and first in the cousins of my kids! So I have thought about grad gi...
 -
 So how many of you procrastinate? I sure do! I always work better under pressure, but not always sure that's a good thing. And I hope I...
 -
 Are you still looking for a fun and quick gift? Want something different? Well, I have the perfect little idea for you! And it's so fun...
 -
 This shop has been compensated by Collective Bias, Inc. and its advertiser. All opinions are mine alone. #BringingInnovation #Collect...
 -
 This shop has been compensated by Collective Bias, Inc. and its advertiser. All opinions are mine alone. #DropShopAndOil #CollectiveBi...
 -
 So So So excited to share this week's From this to that Friday with you!!! I thought of this last year and never got a chance to make i...
 -
 The FB Silhouette Challenge Group I recently joined challenged us to use fabric in our projects for February on our Silhouette machines, ...
 -
 This week my daughter's class celebrated the 100th day of school. They were all told that they could dress up the way they think they w...
 -
 Whether you are wanting to make the nativity ornaments or the Minecraft, the inserts all work the same. And they are sooooo easy! Supplies...
 -
 A friend found this quote and came over to my house to make it and I loved it so much I made one too! I want to create a little reading noo...
I party at:


Button Up!
I'm a member of the Church of Jesus Christ of Latter-Day Saints and proud to be an #ldsmommyblogger

If you would like to know more, you can click on the picture of Christ above.
Papercrafting Below:
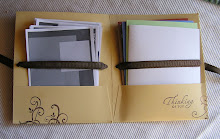
Card portfolio
Inside view
Side-view

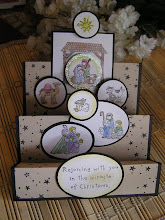
Stair-step card
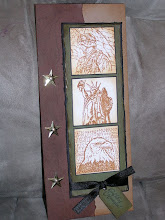
Army Pride
One Sheet Wonder Layout

More OSW with Sunbeam Stamps

Photo cards


Gig 'Em!