Well, I knew this has been coming, but I think I have been in denial a bit until this week. Life kinda took me away from blogging this week and I think it will more in the future as well. I'll still be here, but not daily. Hoping a couple days a week at least still, but I have decided that I don't want my younger two to only remember me on the computer and doing orders for etsy as they grow up. I want them to remember me spending time with them, being present in their lives, and that is the season I am in right now. Love to create still and will continue, just might not get to share it quite as often as before.
Anyway, I DID however totally organize my craft "room" (closet) and label it and will share it with you next week!!! Exciting for me!
Have a great weekend!
Friday, February 28, 2014
LIfe of a blogger
Friday, February 21, 2014
Park vs. Blogging
Well, today I was faced with the following dilema: getting out of the house for a bit and taking my girls to have lunch at the park with some desparately needed attention for them and time for me...OR...blogging and folding laundry at home. Well, honestly in the past year, the latter has usually won, but not today! Yeah for crazy windy park days!
Meanwhile, check out this yummy recipe that Lil' Luna shared today on her blog. They look sooo good! You can find her recipe here. 
Happy Weekend!
Thursday, February 20, 2014
Crafts by a Kid
In my family, my kids draw names with their cousins each year for Christmas and gift giving. Well, my 7 year old niece had requested a "kit" to make vinyl crafts with. What a fun idea! Don't ask me why I hadn't thought of doing this before for my own daughter!!! She would love it!
So, I put together a few projects for her and gave her the supplies she would need to make something (example: wooden blocks, sandpaper, paint, and vinyl)
I was so excited to get this picture from her and her mom with one of the finished projects!
.jpg)

Wednesday, February 19, 2014
Lentil Stew (that my kids EAT!)
I don't know about you, but my kids are not always the best judge of food I serve. ha! BUT I was happy to see that ALMOST all of them ate this recipe up the other night!
Lentil Stew! I grew up with my mom serving it and I personally LOVE it, but for some odd (wink, wink) reason...my kids don't always agree with me. haha
It really IS good though! Here's the recipe for you to try it out at your house tonight!
(The picture isn't the best, bc I hadn't planned on posting it originally, so just took one with my iphone for Instagram, but I've had so many requests, here it is!)
 Serve and enjoy!
Tuesday, February 18, 2014
Flattered and Featured!
I was so crazy excited that Crataholics Anonymous featured me and my DIY Sock Minion on her FB site. I mean, she's BIG! I mean 203K likes on her FB BIG! Love her blog site AND her FB one!
They are both so different. She spends so much time taking on peoples questions on her FB site here and posts them, so that anyone can answer and help, because, as much as we think we all know, there is no way we know it all! This way, it gets out to so many more people! AND she personally responds to everyone letting them know when their question will come on, so that you don't miss all the helpful suggestions people give.
THEN!!! You still have her blog she runs that has super fun ideas there too! Right now she has a super cute crafty free printable you can find here. Too funny!
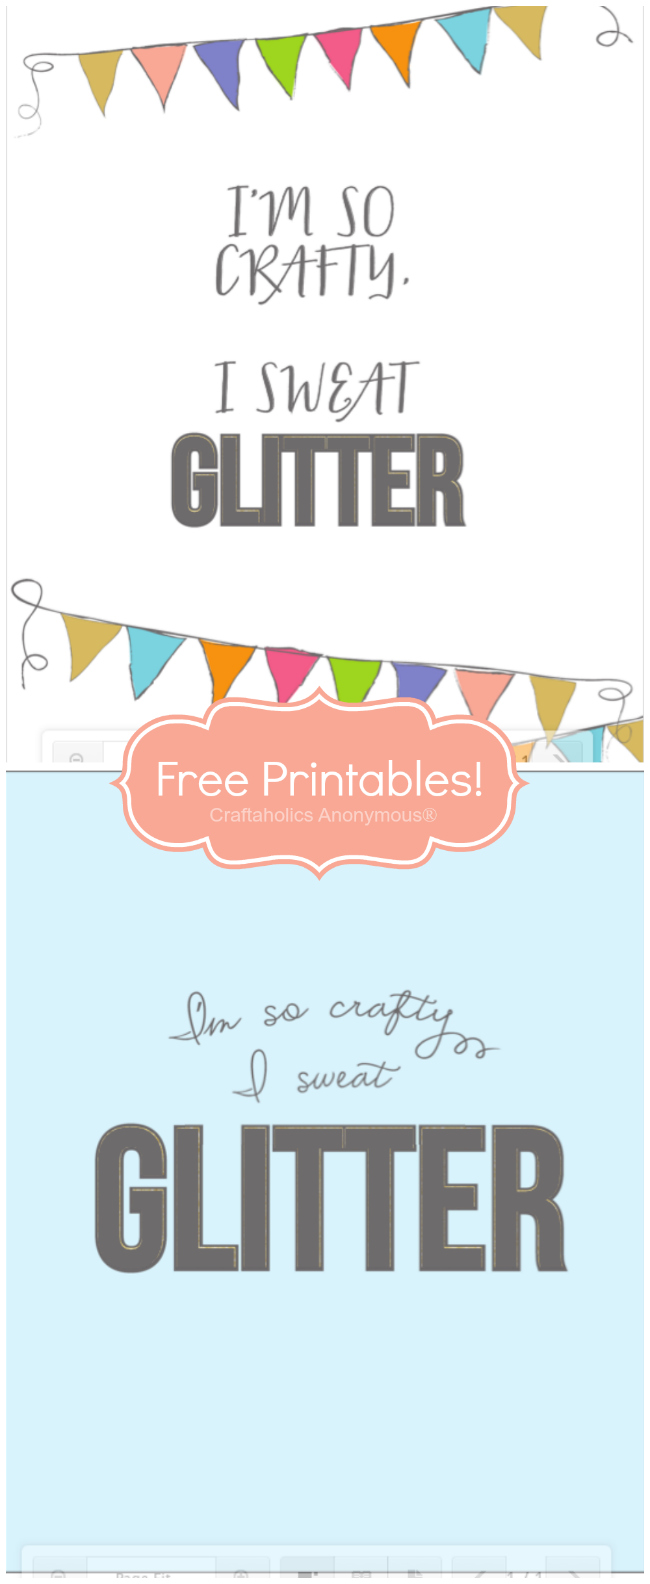
Go to her site and download this for free. Thanks Craftaholics Anonymous!
Monday, February 17, 2014
Indoor Smores! (Yummmm!)


Friday, February 14, 2014
Great sites to find Silhouette promotions and codes
I've mentioned a couple times recently the FB group I have joined that is a Silhouette Challenge group. I absolutely have loved being part of it so far. They are a group of Silhouette lovin' people that are all so helpful, encouraging, and ego-building. They have answered questions, given tips, shared tutorials, files and projects and more! AND there are several who have their own blogs/sites where they share their affiliate codes for Silhouette promotions. I am personally, not an affiliate, which is good for you today, bc that means I can share all the codes and were to get them with you! And let me tell you, there are some great deals going on right now on several!
Check them out!
- CLOSET: Lauren Lanker at The Thinking Closet http://www.thinkingcloset.com
- SUGARBEE: Mandy Williams Beyeler at Sugarbee Crafts http://www.sugarbeecrafts.com/
- BABBLE: Jeanie Kuklish Hevener at Create & Babble http://createandbabble.com/
- SUBURBLE: Tara Tee at Suburble http://www.suburble.com/
- ARTSY: Amy Davidson Latta at One Artsy Mama http://www.oneartsymama.com/
- FINDS: Carrie Hurst at My Favorite Finds http://myfavefinds.com/
- HAPPIER: Melissa Riker at The Happier Homemaker http://www.thehappierhomemaker.com/
- BRAGGING: Briann Barnum Neeley at The Bragging Mommyhttp://www.thebraggingmommy.com/
- VINTAGENEWS: Candace Hutchins Herrero at Vintage News Junkie http://www.vintagenewsjunkie.com/
- GIRLCREATIVE: Diana Mauro Miller at The Girl Creative http://www.thegirlcreative.com/
- TURQUOISE: Laura Nickelson at The Turquoise Home http://www.theturquoisehome.com/
- FUNCTIONAL: Jessi Wohlwend at Practically Functionalhttp://practicallyfunctional.com/
- GINGERSNAP: Ginger Bowie at Ginger Snap Crafts http://gingersnapcrafts.com/
- DESIGNING: Ashley Phipps at Simply Deisning http://simplydesigning.net
Thursday, February 13, 2014
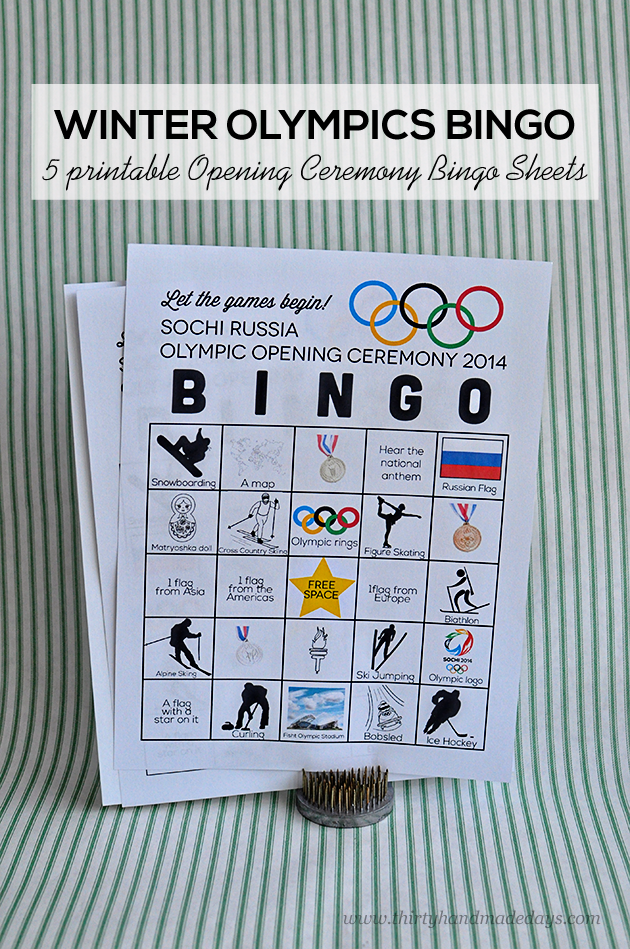
A Feature! Olympic BINGO cards
Our family was getting ready to watch the Olympics last week and I thought...I should make some BINGO cards real quick for my little ones to do while watch. My next thought was that someone probably already had! So I googled it real quick and yep! They were right there!
A Fun Valentine Share/Feature

Wednesday, February 12, 2014
Cupid's {Pixie Stick} Arrows and Targets Valentine Snacks


Last minute Creative Valentine Ideas for kids


Monday, February 10, 2014
DIY Sock Minion

Interested in making one yourself? I'm posting a tutorial with step by step instructions below on how to make your very own DIY Sock Minion, so keep reading!
PLUS...I've got even more for you today after the tutorial! 44 other projects that you can do with fabric and your Silhouette from the SIL Challenge Group!
Now for that tutorial...here are my step by step instructions as to how I made it. :)


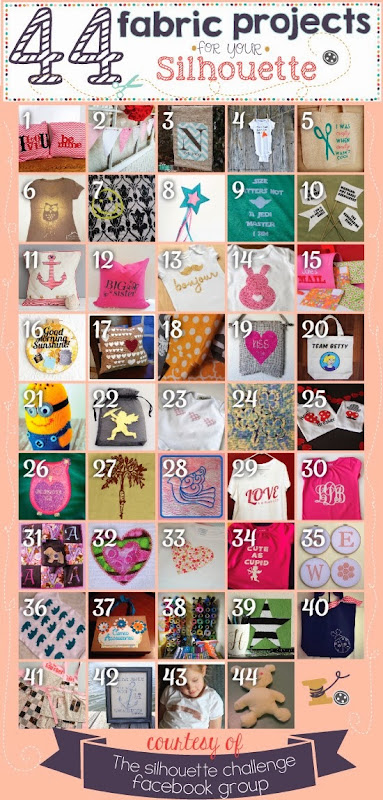
- No-Sew Valentine's Day Pillows by A Tossed Salad Life
- No-Sew Interchangeable Fabric Bunting by unOriginal Mom
- Monogrammed Burlap Garden Flag by The Turquoise Home
- Crawl, Walk, Bike by It's Always Craft Time
- Freezer Paper Stenciled Tote Bags by Weekend Craft
- DIY Bleach Spray Shirt by Practically Functional
- Stenciling Sherlock by Please Excuse My Craftermath...
- Felt Star Wands by Cutesy Crafts
- Yoda Kid's T-Shirt by Architecture of a Mom
- Mark Your Territory- Dog Flags by Black and White Obsession
- Nautical Pillows by Lil' Mrs. Tori
- Big Sister Gift & Silhouette Cut File by Creative Ramblings
- Nerdy Baby Onesies + Free Cut File by Essentially Eclectic
- Easy Easter Bunny Onesie - Silhouette Cameo Craft by Adventures in All Things Food & Family
- Fabric Envelopes for LEARNING LETTERS! (& cut file) by From Wine to Whine
- "Good Morning, Sunshine!" Memo Board by Tried & True
- Hearts-A-Lot Burlap Pillow Cover by My Paper Craze
- Baby Quilt by Dragonfly & Lily Pads
- Surprise Holiday Banner by Whats Next Ma
- "Team Betty" Tote Bag by The Thinking Closet
- DIY Sock Minion by Create it. Go!
- Pretty Up Some Organza Bags by Getsilvered
- Easy Heart Appliqued Onsies by Create & Babble
- Bleach Pen Gel & Freezer Paper Stencils Made with the Silhouette Machine by Bringing Creativity 2 Life
- Valentines Baby Onesie & Boy's Shirt + Free Cut Files by The Frill of Life
- Valentine's OWL Always Love You T-shirt by My Favorite Finds
- DIY Screen Printed Curtains by Chicken Scratch NY
- Fabric Painted Quilted Wall Hanging by Terri Johnson Creates
- Glitter Iron-On Top by Simply Kelly Designs
- DIY Monogrammed T-shirts with Silhouette Heat Transfer Material by Pitter and Glink
- Birthday Challenge by Fadville
- Machine Applique with SIlhouette Cameo by The Sensory Emporium
- Fabric Applique Valentine's Day T-Shirt by DailyDwelling
- "Cute as Cupid" shirt by crafts, cakes, and cats
- Sew Cute Applique by Life After Laundry
- Rhino Onesie by It Happens in a Blink
- Upcycled Birchbox Cameo Accesory Organizer by Cupcakes&Crowbars
- Customizing textiles with Heat Transfer Vinyl (working title) by feto soap
- Easy Fabric Art by McCall Manor
- Lady Bug Tote Bag with Silhouette Rhinestones by Ginger Snap Crafts
- Mommy and Em's Coordinated Aprons by TitiCrafty
- Canvas sketch project and a share by Clever Someday
- Foxy Lady Pajamas by Mabey She Made It
- Teddy Bear by Work in Progress


Welcome!

Hi! I'm Robyn from Create it. Go! and I love to create! Whether its a wood craft, painting, papercrafting, simple sewing, vinyl, new recipes, photography adventures, or fun with my Silhouette, join me for tutorials and loads of fun!


Follow me on Instagram!

Member of the Glue Dots Design Team

Find me here!


POPULAR POSTS
-
 Two of my nieces are graduation from high school this year...the oldest and first in the cousins of my kids! So I have thought about grad gi...
 -
 So how many of you procrastinate? I sure do! I always work better under pressure, but not always sure that's a good thing. And I hope I...
 -
 Are you still looking for a fun and quick gift? Want something different? Well, I have the perfect little idea for you! And it's so fun...
 -
 This shop has been compensated by Collective Bias, Inc. and its advertiser. All opinions are mine alone. #BringingInnovation #Collect...
 -
 This shop has been compensated by Collective Bias, Inc. and its advertiser. All opinions are mine alone. #DropShopAndOil #CollectiveBi...
 -
 So So So excited to share this week's From this to that Friday with you!!! I thought of this last year and never got a chance to make i...
 -
 The FB Silhouette Challenge Group I recently joined challenged us to use fabric in our projects for February on our Silhouette machines, ...
 -
 This week my daughter's class celebrated the 100th day of school. They were all told that they could dress up the way they think they w...
 -
 Whether you are wanting to make the nativity ornaments or the Minecraft, the inserts all work the same. And they are sooooo easy! Supplies...
 -
 A friend found this quote and came over to my house to make it and I loved it so much I made one too! I want to create a little reading noo...
I party at:


Button Up!
I'm a member of the Church of Jesus Christ of Latter-Day Saints and proud to be an #ldsmommyblogger

If you would like to know more, you can click on the picture of Christ above.
Papercrafting Below:
Card portfolio
Inside view
Side-view

Stair-step card
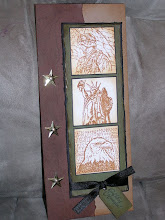
Army Pride
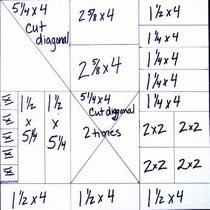
One Sheet Wonder Layout
More OSW with Sunbeam Stamps
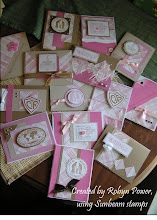
Photo cards
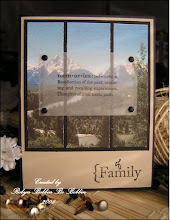

Gig 'Em!