

 I REALLY did mean last Wednesday, not this one to look for more posts, but life seemed to get in the way. (In particular Halloween and all the festivities, as well as some stuff I was making for our PTO Room Parents)! Although I just have to say how happy I was with the costumes I made for my kids!!!!! Check out
  the picture! Way cute and so original right? I love
 d them and so did my DH and kids. You can see more pics on my family's blog here and more deets about them there as well if you want them.) Nonetheless, here is my post I promised, albeit a week late. Maybe you can use the ideas for next year.
Last year I made these cute brown bag brooms that I still think are too cute! You can fill them inside with whatever you want! I though t they were so cute and easy that I would make another this year.
I also made these cute and simple little treat boxes for my piano students as well as these cute witch shoes that I have been seeing a lot of this year. They look much harder than they are. They really are so fast and easy! It's just cutting out a template and taping them all together and adding the finishing touches and a bit of candy! (The pictures are above, at the top, and there is one pic of the template cut out before I folded and taped it together.) (Also, I actually printed them out three different sizes and like the smallest size the best.) I put a ruler next to them to show you the smallest size. I think that is actually 50 percent of what the original size was and it printed out that way from one  link. Another link printed about 75 percent and I enlarge the 50 percent one to a full 100 and made all three sizes. (The pic is only of the smallest size. That way you can even do two shoes or just one still. I also saw a post on splitcoast where someone did these as glass slippers!) Here is where you can find the template. There are a ton of o
 ther examples if yoiu search under "witch shoe" on Splitcoast too. (And yes, the witch's shoe was one of the sneak peak's from a couple of week's ago. Good job L at guessing what it was! The other sneak peak is still in the works.)
I've also been wanting to make this mummy card for the past two years and finally did this year!
 Another idea that we did for decorations for the tables at an Enrichment (ladies church activity) a few years ago (when I was over Enrichment) were these cute gnarled looking paper trees. Once we made one, it was easy from there on, and it was neat to see how each one turned out different from the previous one. We also punched out little leaves in fall colors and sprinkled them around the tree and put the candy corn pumpkins around as well on the tables. (We didn't put ghosts around it-this is Family Fun's stock pic. I don't have a pic of mine-should make another...) I got the idea from Family Fun here.
 Last thing I made was this cute little card that I saw here on Splitcoast. (Man! Do I have enough hyperlinks in this post?!) I changed it up a bit and think it would be sooo cute hanging from the brooms (making it smaller) or just the way it is as a card. I'm thinking that next time I might try stamping and embossing the Priceless stamp set swirl on the boot in a dark purple????
Anyway, some Halloween fun for you...maybe next year you can use some of these ideas if you want. :)
(One more idea that is fun for kids is found here at Family Fun. It is the template of a skeleton (separate bones) that you can just print out (and laminate if you want-I have a laminator, so I did that.) and let your kids have fun putting it together and hanging up in your window or on the wall each year. I actually posted this earlier last month on my family's blog, but thought I might as well mention it here too in case you wanted it and don't know my family-therefore you wouldn't check my other blog.) Here is a link to my post about it on my other blog and a pic of ours as well if you want to check it out.
Hope your Hallweens were great!
Wednesday, November 5, 2008
...and now a week later
Subscribe to:
Post Comments (Atom)
Welcome!

Hi! I'm Robyn from Create it. Go! and I love to create! Whether its a wood craft, painting, papercrafting, simple sewing, vinyl, new recipes, photography adventures, or fun with my Silhouette, join me for tutorials and loads of fun!
Instagram: @robyncreates
POPULAR POSTS
-
Two of my nieces are graduation from high school this year...the oldest and first in the cousins of my kids! So I have thought about grad gi...
-
So how many of you procrastinate? I sure do! I always work better under pressure, but not always sure that's a good thing. And I hope I...
-
Are you still looking for a fun and quick gift? Want something different? Well, I have the perfect little idea for you! And it's so fun...
-
This shop has been compensated by Collective Bias, Inc. and its advertiser. All opinions are mine alone. #BringingInnovation #Collect...
-
This shop has been compensated by Collective Bias, Inc. and its advertiser. All opinions are mine alone. #DropShopAndOil #CollectiveBi...
-
So So So excited to share this week's From this to that Friday with you!!! I thought of this last year and never got a chance to make i...
-
The FB Silhouette Challenge Group I recently joined challenged us to use fabric in our projects for February on our Silhouette machines, ...
-
This week my daughter's class celebrated the 100th day of school. They were all told that they could dress up the way they think they w...
-
Whether you are wanting to make the nativity ornaments or the Minecraft, the inserts all work the same. And they are sooooo easy! Supplies...
-
A friend found this quote and came over to my house to make it and I loved it so much I made one too! I want to create a little reading noo...
Copyright Protection
All of my creations and designs and photographs are not available for you to copy. (If found on google searches, they are still not free to use and copy.) They are mine alone and are sold in my etsy shop or not for sale. Please do not copy or use them for sale without written permission from me. Please message me if you have any questions.
BLOG ARCHIVES
-
▼
2008
(160)
-
▼
November
(19)
- Faux silk
- Fun turkey craft for kids-Disguised Turkeys
- Missed club nights
- Busy! Busy!
- Great little Gifts
- New Scrappin' style
- More stamp club
- Christmas cards
- Stamp club
- From this to That Friday
- Guest blogging
- Room Parent Handouts
- Been busy!
- Simply Baroque
- Guest Blogger
- From This to That Friday
- Love it!
- Coming soon, to a theater, no a blog!, near you!
- ...and now a week later
-
▼
November
(19)
target="_blank">


Button Up!
I'm a member of the Church of Jesus Christ of Latter-Day Saints and proud to be an #ldsmommyblogger
PLEASE!
All pictures on this site are not to be used as your own. If you would like to use them for ideas or inspiration for yourself, I am glad to help, but they are not for sale, to be entered in any contests or under any other name but mine. Please refer anyone back to my blog and me if you are posting them anywhere else. Thank you!
Papercrafting Below:
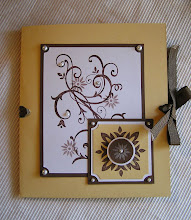
Card portfolio
Inside view
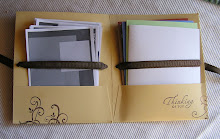
Side-view
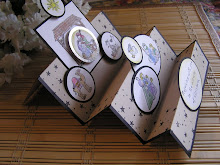
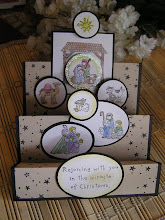
Stair-step card
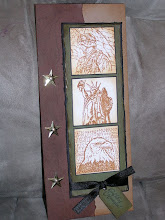
Army Pride
One Sheet Wonder Layout

More OSW with Sunbeam Stamps

Photo cards


Labels
100
(1)
acorns
(1)
apply
(1)
april fools
(1)
autumn
(1)
baby
(1)
baby boy
(1)
baby girl
(1)
baby shower
(1)
baking
(2)
balloon
(1)
basketball
(1)
blocks
(1)
book
(1)
box
(1)
bubble gum machine
(1)
bunny
(1)
cake
(1)
cardmaker
(1)
chips. healthy
(1)
christmas
(2)
cigars
(1)
cleaning
(1)
countdown
(1)
craft
(1)
craftiness
(42)
daughter
(1)
decorating
(1)
diapers
(1)
DIY
(18)
dog treats
(1)
dogs
(1)
easter
(4)
eggs
(1)
fall
(4)
family
(2)
fathers day
(2)
faux
(1)
free
(1)
FTTT
(4)
game
(1)
games
(1)
gift
(4)
gifts
(2)
glass block
(1)
glue dots
(1)
gluten free
(4)
graduation
(1)
grandparents
(1)
gratitude
(1)
halloween
(4)
handprints
(1)
healthy
(2)
holidays
(1)
home and family
(43)
homedecor
(2)
how to
(5)
jam
(1)
keepsake
(2)
kids
(8)
kidscraft
(5)
kool aid
(1)
lds
(2)
light
(2)
love
(1)
mother
(3)
mothers day
(2)
movie
(1)
new years
(1)
no carve
(1)
old lady
(1)
organize
(2)
OSW
(1)
pamper
(1)
papercrafting
(2)
party
(4)
pets
(1)
photography
(1)
pickle
(1)
printable
(1)
printables
(10)
pumpkin
(1)
pumpkins
(3)
recipe
(4)
recipes
(22)
repurpose
(2)
rustic
(1)
scavenger hunt
(1)
science
(1)
scouting
(1)
scouts
(1)
sewing
(1)
share
(2)
shopping
(1)
sign
(1)
silhouette
(4)
snack
(1)
soccer
(1)
spider
(1)
spiders
(1)
spring
(1)
st patricks day
(1)
star wars
(2)
teachers
(1)
temple
(1)
temples
(1)
thanksgiving
(1)
traditions
(1)
treat
(2)
treat jar
(1)
treats
(2)
tricks
(1)
turkey
(1)
tutorial
(3)
tutorials
(29)
ukulele
(1)
upcyclesrepurposes
(4)
valentine
(1)
valentines
(1)
valentines day
(3)
vinyl
(7)
word art
(2)
yoda
(1)
Gig 'Em!


0 comments:
Post a Comment